Zimbra to Office 365 Migration Guide
Switching email platforms can be daunting, but for many organizations, the benefits of transitioning to Microsoft Office 365 can make it worthwhile. If you're considering or planning a Zimbra to Office 365 migration, you’ve come to the right place.
This guide provides a general overview of the migration process and explains the two methods of transferring user content from Zimbra Mail to Office 365: automatic and manual.
Whether you're an IT professional or managing the migration for your small business, our step-by-step guide will help you tackle this process with no issues.
Office 365 is the legacy name of the Microsoft 365 package. In this article, "Office 365" and "Microsoft 365" are used interchangeably.
Steps for Migrating Zimbra Mail to Microsoft
Transferring your Zimbra mailboxes (all cloud Zimbra versions) to Office 365 can feel challenging, but breaking the process into clear, actionable steps makes it much more manageable.
This section offers a general overview of the Zimbra to Microsoft migration process. Detailed explanations for the two migration approaches will be provided in the next sections.
To migrate Zimbra to Office 365:
- Prepare for your migration.
Start by determining the scope of your migration. Consider whether you need to transfer only emails or include contacts, calendars, or other data critical to your workflow as well.
Next, establish a timeline. The migration's duration depends on the number of mailboxes and the amount of data to be transferred. Evaluate your deadlines and plan backward to allocate sufficient time for preparation, migration, and verification. Remember that larger migrations may take several days, so consider adding a few more days to your timeline just to be safe.
- Create a backup of your content.
Before starting to migrate your content, it's always a good idea to create a backup of your most important Zimbra emails. Third-party automated tools for email migrations provide accurate results and do not usually require a backup. However, free migration methods are riskier, so having a backup will allow you to recover the data if anything goes wrong.
For example, you can export your email data into a file format like .pst and store it securely.
- Choose a migration method.
There are two approaches to migrating emails:
- Using paid third-party tools for a fully automated experience
- Using free tools that require a lot of manual setup
The choice depends on multiple factors, including the scope of your migration and the availability of resources (time, money, and technical skills).
Microsoft's native migration tools, although free, require a lot of manual work and expertise, while third-party tools like VaultMe automate most tasks. For more information on what you should consider when choosing a migration method, see this article: How to Choose an Email Migration Tool.
- Sign up for Office 365.
Buy an Office 365 subscription and create accounts for all users, if necessary. If you have your domain, you can continue using it with your Microsoft 365 Office subscription: simply sign up for Office 365 with your primary (admin) email address and verify the ownership of the domain during the sign-up process. However, you can also change your domain and create brand-new email addresses in Office 365.
Then, activate OneDrive for each user in the organization. You must do that prior to the migration. To activate OneDrive, users must sign in to their OneDrive accounts at least once. Alternatively, you can activate user OneDrive accounts on your own using the following instructions: Pre-provision OneDrive for users in your organization.
- Transfer your mailbox(es).
Once you've chosen a migration method, it's time to transfer your mailboxes. But before you begin, ensure that each user account has sufficient storage space in Office 365. By default, users may have 50 or 100 GB of mailbox space in Outlook Office 365.
Then, follow the instructions for your selected approach and monitor your migration. Paid automated tools often provide real-time updates, while free approaches often require manually ensuring the process goes as planned.
- Verify the results.
After the migration process is complete, it’s important to verify that all data has been transferred successfully. This can include ensuring that:
- The folder structure from Zimbra has been preserved in Office 365 (where applicable).
- All emails, including older messages and archived folders, have been transferred accurately.
- Attachments are intact and accessible in their respective emails.
Additionally, review your migration report, if available. While VaultMe generates detailed migration reports for each account, other tools, including free Microsoft ones, do not usually have reports.
- Change MX records.
If you've chosen to keep your email addresses, once you’ve reviewed the migration results and are ready to fully transition to Office 365, update your domain’s MX records to direct incoming emails to Office 365. MX records are DNS records that indicate how the incoming email should be routed. All future emails will start arriving in Office 365 instead of Zimbra only after you update the MX records.
MX records can be changed through your domain registrar or hosting provider. Microsoft provides detailed instructions on setting these records in this article: Add DNS records to connect your domain.
- Close your Zimbra account.
If you no longer intend to use your Zimbra account, consider closing it to avoid unnecessary costs or maintenance. Deleting unused accounts is a recommended best practice to reduce the risk of identity theft and maintain security.
We recommend waiting at least 30 days after the migration before deleting the old account.
Migrate Zimbra Mail to Office 365 or Exchange Automatically
Migrating Zimbra mailboxes to Office 365 automatically using a paid third-party tool is the recommended method for transferring emails to a different service provider.
VaultMe is one such tool. Designed for individuals, businesses, educational institutions, and IT professionals, VaultMe offers a user-friendly interface that simplifies the email transfer process.
Compared to free tools, VaultMe has many advantages:
- VaultMe ensures all content retains its original organization, formatting, and dates.
- The app is an online migration tool that requires no download or installation.
- VaultMe significantly reduces the time and effort required compared to free methods.
- VaultMe offers dedicated support to assist with pre-migration questions, migration progress tracking, and post-migration inquiries.
- VaultMe can migrate your Zimbra mailboxes to Office 365 or Exchange.

To migrate Zimbra emails to Office 365 automatically:
-
Navigate to the VaultMe app.
-
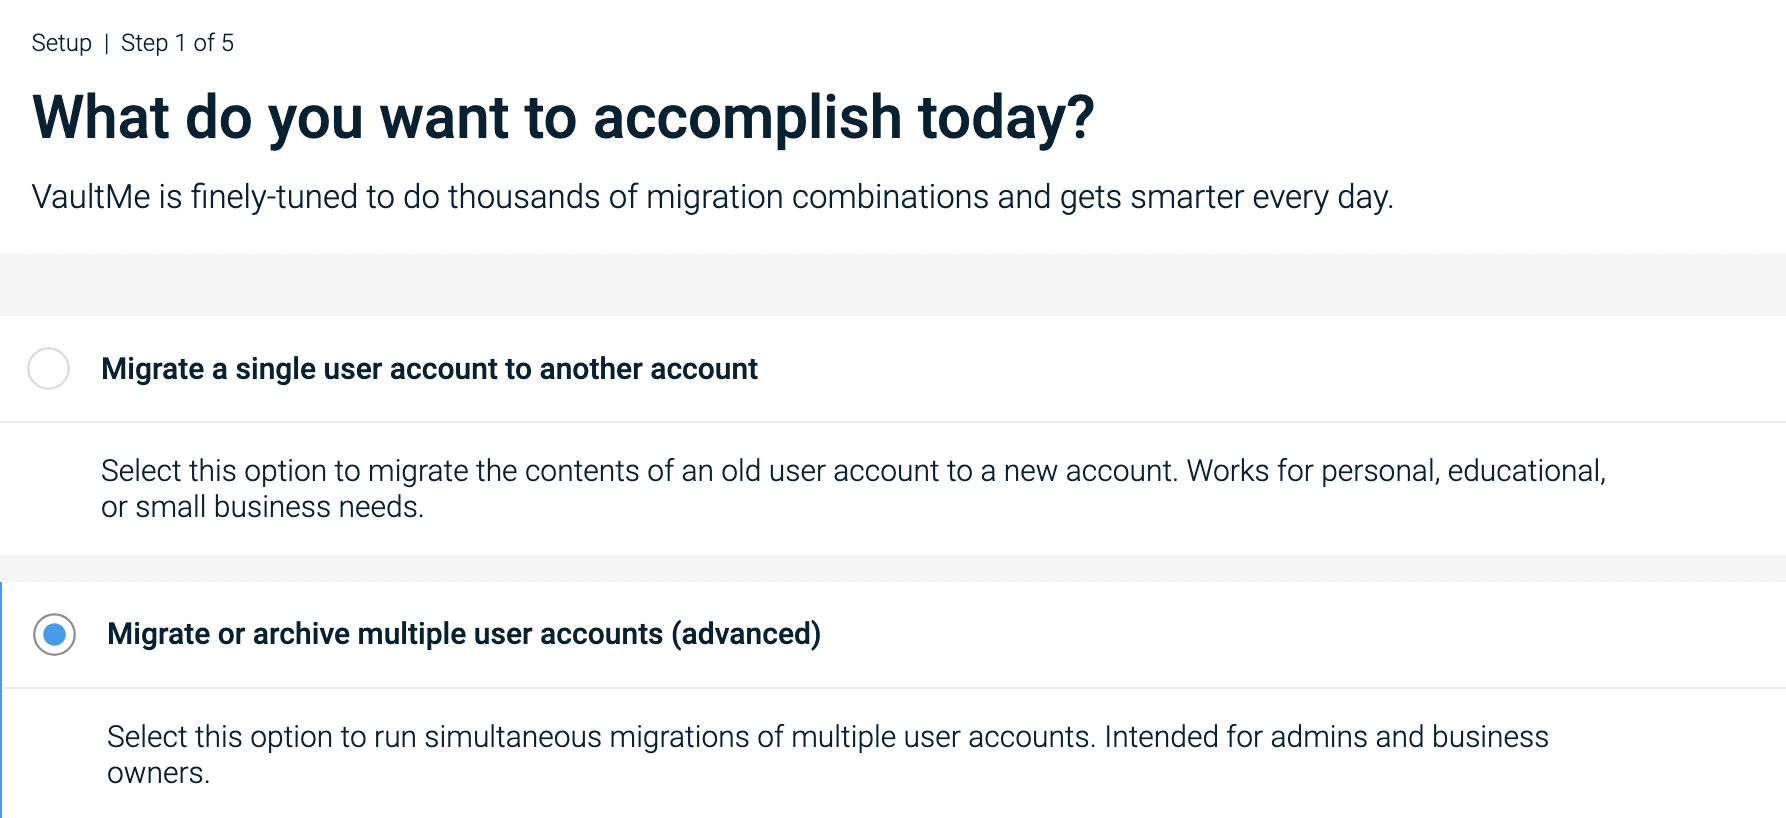
Select "Migrate or archive multiple user accounts (advanced)." If you have only one or two user accounts, you can use VaultMe for Individuals and migrate your accounts one by one. In this case, select "Migrate a single user account to another account."

How to create a VaultMe for Admins account -
Create your VaultMe for Admins profile.
-
Select your source and destination service providers. For the source service provider, choose "IMAP." For the destination service provider, choose "Microsoft 365."
-
Decide how you want to connect your source accounts. Since domain authorization is unavailable for IMAP migrations, you can connect each source account on your own or send sign-in links to users and instruct them to connect their accounts.
-
Connect your destination accounts. We recommend using domain authorization for your Office 365 / Microsoft 365 accounts.
-
Add user accounts to the migration plan.
-
Review the information regarding the data VaultMe will be able to migrate.
-
Decide if you want to merge the copied emails with those in the destination accounts or put them into separate folders.
-
Review the price breakdown and proceed to checkout. VaultMe's prices are outlined on this page: VaultMe's Pricing. Refer to the VaultMe for Admins pricing.
-
Begin your migration. You can safely close your browser or power off your computer without interrupting the process.
-
Track the progress of your Zimbra to Office 365 migration using the real-time updates on your migration page (optional). You’ll receive an email notification when your migration is complete.
-
Check the results and download your migration report. Additionally, you can download your invoice from the migration page.
The VaultMe app will not remove emails from Zimbra or redirect your mail. It will simply copy your Zimbra emails to Office 365. If you are keeping the email addresses the same, emails will start arriving in Outlook only after you change the MX records to point emails to Office 365.
Migrate Email from Zimbra to Office 365 with Free Tools
If you want to migrate multiple Zimbra accounts to Office 365, you can try using Microsoft's free IMAP mailbox migration tool. For more information about this tool, refer to the following article: What you need to know about migrating your IMAP mailboxes to Microsoft 365 or Office 365.
Note that IMAP migrations to Office 365 with free tools typically have limitations, such as:
- Certain metadata (read/unread statuses, labels, categories, and flags) may not transfer accurately. Folder hierarchies might also be broken.
- The process can be slow, especially for large mailboxes.
- Transferring sensitive email data over IMAP requires ensuring the connection is secure (e.g., using SSL/TLS). If not configured properly, it can pose a security risk.
- Errors such as incomplete transfers or skipped emails may need to be manually identified and resolved, adding complexity to the process.
For advanced deployment guides, refer to this guide: Advanced deployment guides for Microsoft 365 and Office 365 products.
Microsoft does not offer support for free tools. A lot of manual work is required to set up migration for multiple users.
If you have only one account to migrate, you can manually export your emails from Zimbra and then import them to Office 365. However, you will need to install a desktop email app such as Outlook or Thunderbird to be able to do so.
Note that this method also has limitations, including the following:
- The process can take several hours or even days; for larger accounts, it may extend to a week or more.
- Labels, read/unread statuses, and formatting may not transfer successfully.
- Your computer must remain powered on throughout the entire process.
- A stable and uninterrupted broadband connection is essential.
- It may require technical knowledge or troubleshooting if errors occur.
- There is a risk of data duplication or loss during the transfer.
This is a slow and potentially error-prone process. Ensure you have a backup of your data before you proceed.
To manually migrate a Zimbra Mail mailbox to Office 365:
-
Install the Outlook app on your computer.
-
Connect your Zimbra and Office 365 Outlook accounts to the app.
-
In the left-hand menu, navigate to your Zimbra account. In the top menu, go to File > Export.
-
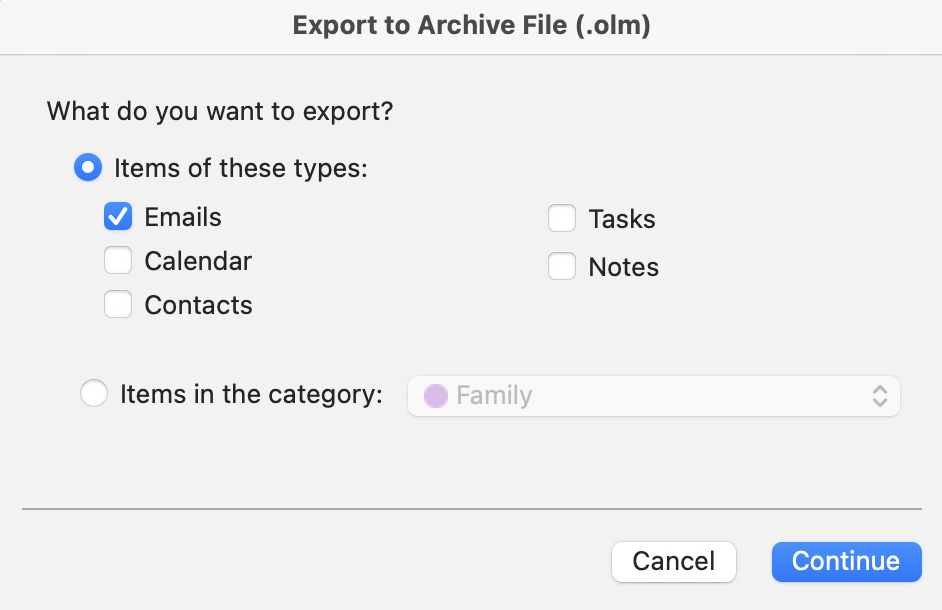
Select "Emails," then click "Continue." Download the suggested .olm file (on a Mac computer) or the .pst file (on a Windows machine). This will export your Zimbra emails to a hard drive.

Exporting Zimbra emails using the Outlook app -
In the left-hand menu, go to your Office 365 account. In the top menu, navigate to File > Import.
-
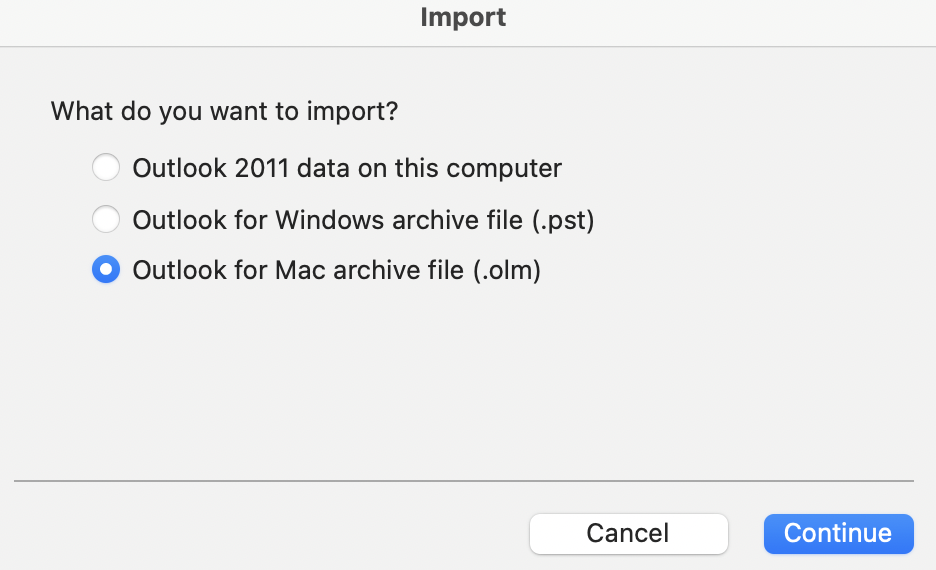
Select the file that you downloaded to import Zimbra to Office 365.

Importing Zimbra emails using the Outlook app -
Allow time for the emails to upload to your Office 365 account. This process can take several hours or even days, depending on the size of your account. Keep your computer powered on and ensure your internet connection remains stable throughout.
-
Check the results.
Frequently asked questions about Zimbra to Office 365 or Exchange migration
How do I convert Zimbra to Outlook?
Zimbra and Outlook are two different email services that are not integrated. While you can't truly convert one service into the other, you can create an account in Office 365 / Microsoft 365 and transfer your Zimbra emails there. You will be able to keep using your domain with Microsoft, so your email address will not change, and your email history will not be lost. Consider using automated tools like VaultMe to simplify the transfer.
How do I export my mailbox from Zimbra?
You can do that using a desktop email app such as Outlook. After connecting your Zimbra account to Outlook, navigate to File > Export and download your email archive. Note, however, that the file will only be usable if you import it into another account or a desktop email app.
If you want to export your mailbox from Zimbra to a different email account (such as Gmail, Google Workspace, Outlook, etc.), consider using automated email migration tools. This will simplify the process and ensure that no metadata is lost.
Why migrate email to Office 365?
Office 365 is a productivity and collaboration suite. With Office 365, you will be able to use multiple services provided by Microsoft, including not only Outlook for your emails, but also OneDrive for your cloud storage and collaboration. An Office 365 subscription also includes access to all Microsoft 365 desktop apps (Word, PowerPoint, Excel, Outlook, and others).
Conclusion
Migrating email from Zimbra to Office 365 is one of the most important steps when transitioning to Microsoft. While the process might seem overwhelming, a well-structured plan, like the one detailed in this guide, can make the migration from Zimbra to Outlook easier.
For an easier experience, consider using a Zimbra to Office 365 migration tool like VaultMe. These tools can automate much of the process, saving you time and effort. If you opt to use free tools, be prepared for a more time-intensive procedure and remember to back up your data before beginning.
No matter which method you choose, it’s essential to carefully review the migrated data to ensure everything has been transferred successfully. If you choose to use VaultMe, download and review your migration report.
After your Zimbra to Office 365 email migration, don’t forget to update your MX records to route email traffic to Office 365 and take the necessary steps to deactivate your Zimbra account if you won’t be using it anymore.
Related articles
If you are looking for an email migration tool for your future projects, research your options using our guide: How to Choose an Email Migration Tool.
Need to merge several email accounts into one? See this article: How to Merge Email Accounts in Gmail, Outlook, and Other Services.
Looking for a Microsoft 365 migration guide? Use the following article as your migration checklist: Office 365 Migration Guide: How to Migrate to Office 365.